Localizing Your React-Driven Shopify App: A Detailed Walkthrough
It's no secret Shopify is focusing on reaching merchants wherever they are - and riding Shopify's wave is one of the best ways to improve your App Store rankings, increase your promotional opportunities and reach new merchants.


Note: This article was updated June 17, 2023 to reflect some great changes Shopify made to their CLI frontend templates. Let's not reinvent the wheel here!
In this article, we'll walk you through the process of localizing a simple Shopify app developed with React. We'll use the Shopify CLI tool and the react-i18next framework for localization and TranslateCI for translating your app into French and German. By the end of this guide, you should be ready to prep your own app to translate.
Setting Up Your Shopify App
The first thing you're going to do is install react-i18next and related dependencies. This framework makes localizing much easier.
npm install react-i18next i18next-resources-to-backend @formatjs/intl-localematcher @formatjs/intl-locale @formatjs/intl-pluralrules @shopify/i18next-shopify --savei18next-resources-to-backend: This is a plugin for i18next that loads translations from a backend service. This way, you can keep your translation files separately, for example, on your server.react-i18next: This is a powerful internationalization framework for React / React Native which provides a translation Hook (useTranslation) to use i18next with React.@formatjs/intl-localematcher: This helps match the user's chosen language with the best available language.@formatjs/intl-locale: This is a polyfill forIntel.Locale- which provides an interface for getting information about a specific locale - like number formatting, calendar, etc.@formatjs/intl-pluralrules: This is a polyfill forIntl.PluralRules- which tells i18next how to handle plurals for each supported locale.@shopify/i18next-shopify: This sets up some Shopify-specific options for i18next.
After this setup, your Shopify app is ready for localization. The next step is to configure i18next.
Configuring I18next
In the first version of this article, I included a basic i18next configuration here. However, Shopify has written a fully featured utility file for i18next, so I'm just going to link to it here. They're making it really easy, so go ahead and use it!
Save this as /web/frontend/i18nUtils.js
There's a few things I'd like to point out in this file, and a few customisations you should make.
First, you'll want to customise these lines to make sure they're accurate for your app.
...
/**
 * The default locale for the app.
 */
const DEFAULT_APP_LOCALE = "en";

...
const SUPPORTED_APP_LOCALES = ["en", "de", "fr"];
Shopify passes the user's selected locale in a GET parameter when they open an embedded app. This function reads that and sets the locale. This is super useful because you don't need a language picker. In fact, Shopify prefers to avoid having a language picker altogether. Just use the language that user has set in their admin.
...
export function getUserLocale() {
  if (_userLocale) {
    return _userLocale;
  }
  const url = new URL(window.location.href);
  const locale = url.searchParams.get("locale") || DEFAULT_APP_LOCALE;
  _userLocale = match([locale], SUPPORTED_APP_LOCALES, DEFAULT_APP_LOCALE);
  return _userLocale;
}
Did you know that Polaris provides complete translations for all of their components? They've gone through the trouble of localizing all of their components for you, so all you need to do is load them. Which is done in this file as well.
The last thing I'll point is the backend resource loading. Because you may want to customise it:
function localResourcesToBackend() {
  return resourcesToBackend(async (locale, _namespace) => {
    return (await import(`../locales/${locale}.json`)).default;
  });
}
This sets the path and filename format to your translation files. If there's a better place or naming scheme for your files, you're welcome to set that here.
Make sure you import i18nUtils where it makes sense for your application.
Preparing Templates for Localization
The react-i18next library provides a useful hook named useTranslation that allows us to retrieve the t function. You'll use the t function to get the translation of a given key.
Let's start with a basic example. Imagine we have a simple component, WelcomeBanner.jsx, that displays a welcome message to the user:
import React from 'react';

function WelcomeBanner() {
  return (
    <h1>Welcome to our Shopify App!</h1>
  );
}

export default WelcomeBanner;
To localize this message, we need to wrap the text within the t function from useTranslation. Here's how it's done:
import React from 'react';
import { useTranslation } from 'react-i18next';

function WelcomeBanner() {
  const { t } = useTranslation();

  return (
    <h1>{ t('welcome_message') }</h1>
  );
}

export default WelcomeBanner;
In the code above, 'welcome_message' is the key for the welcome message in our translations.
Plural Example
react-i18next also supports plural forms. Suppose we have a ProductCount.jsx component which displays the number of products:
import React from 'react';
import { useTranslation } from 'react-i18next';

function ProductCount({ count }) {
  const { t } = useTranslation();

  return (
    <p>{ t('product_count', { count }) }</p>
  );
}

export default ProductCount;
In this example, 'product_count' should have two translations: one for singular and another one for plural. In our English translation file public/locales/en/translation.json, we should have:
{
  "product_count_one": "{{count}} product",
  "product_count_other": "{{count}} products"
}
The keys product_count_one and product_count_other will be used depending on the value of count. If count equals one, it uses the singular translation, otherwise, it uses the plural one.
Variable Interpolation Example
react-i18next also supports variable interpolation. For instance, we may want to personalize the welcome message by including the user's name. We can achieve this by passing an object to the t function as its second argument:
import React from 'react';
import { useTranslation } from 'react-i18next';

function WelcomeBanner({ username }) {
  const { t } = useTranslation();

  return (
    <h1>{ t('welcome_message', { username }) }</h1>
  );
}

export default WelcomeBanner;
In our English translation file web/locales/en.json, we should have:
{
  "welcome_message": "Welcome to our Shopify App, {{username}}!"
}
Note: You might be wondering why we are storing these translations in web/locales/en.json. When we configured i18next, we specified that this is how we would store our translation files. You can change it a different convention if you want nested files, or a different structure.
By organizing the translations in this manner, i18next can automatically load the right translations based on the user's language. This will be especially helpful when your app needs to support multiple languages.
Translating Your App
Once your app is ready for translation, it's time for the next step - translation. We'll use TranslateCI, a service that simplifies the process by eliminating manual translation work.
You could also do a whole bunch of work, but go ahead and make it easy on yourself!
After integrating TranslateCI into your app and identifying the strings for translation, TranslateCI does the heavy lifting, translating your app into the target languages.
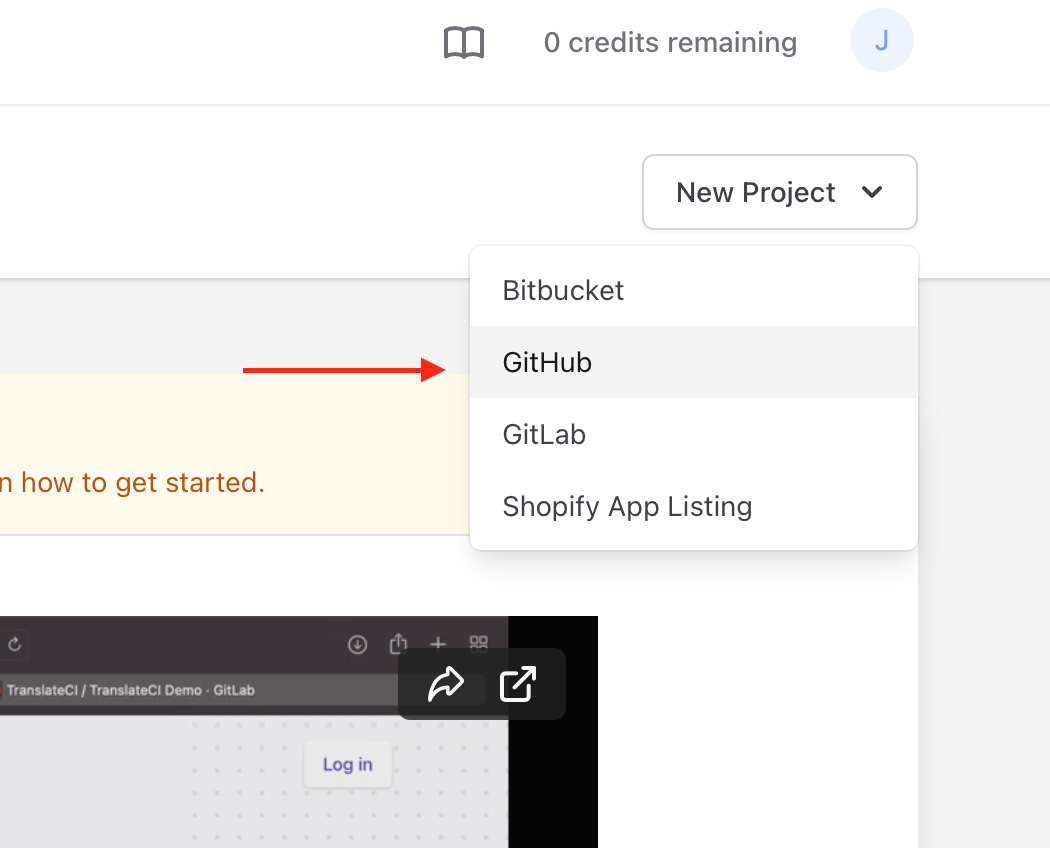
We'll start by logging in to TranslateCI and creating a new GitHub project:
 Then we’ll set up our project:

After we hit save, TranslateCI will take a minute to analyze our repo and give us a quote when it’s ready. We add some credits to our account and ship the job off.
An hour or so later, we get an email that our translation is done and, sure enough, there's a pull request:
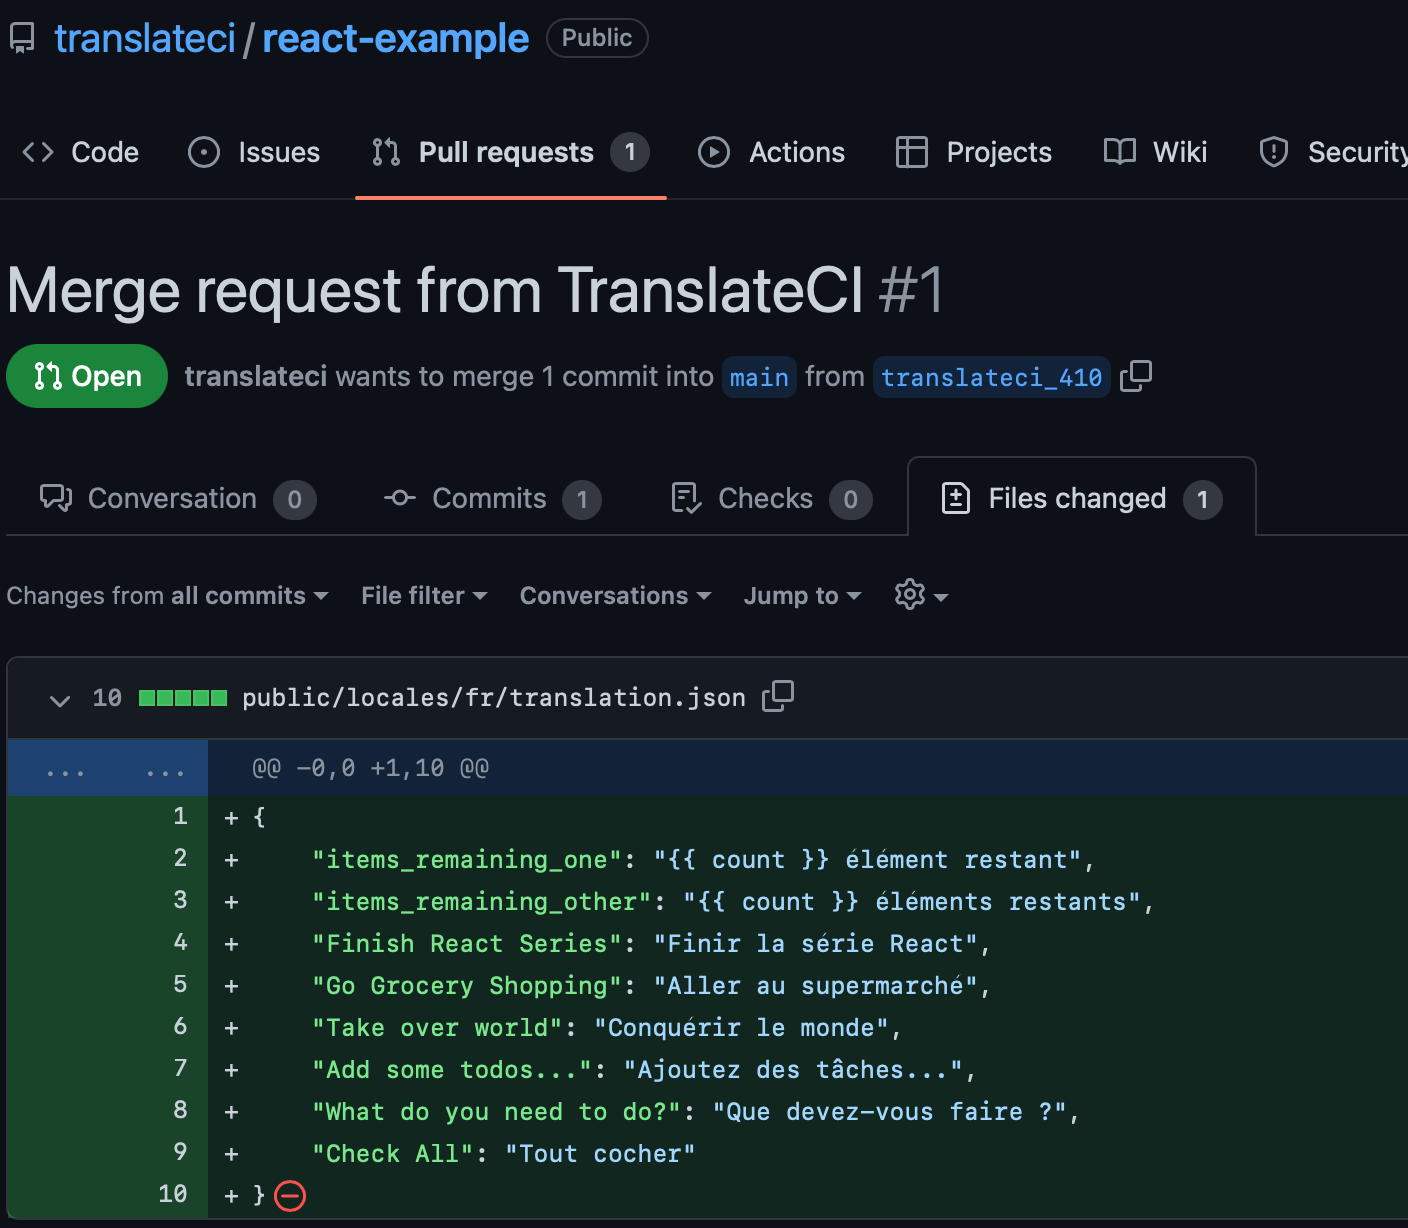 That all looks good, so we merge the pull request and pull the changes down to our dev environment.
Handling Suspense with React
When you're loading translations in your React component, there may be a brief period when the translations haven't yet loaded. During this time, we want to display some sort of fallback UI until the translations are ready.
React provides a built-in way to handle this: Suspense. With Suspense, you can specify a fallback component to display while waiting for something to load. In the context of i18next, we can use Suspense to display a loading message while our translations are being fetched.
Here's how to add Suspense to your main App function:
import React, { Suspense } from 'react';

...

return (

  ...

  <Suspense fallback={<div>Loading...</div>}>

    <Routes pages={pages} />

  </Suspense>

  ...

);
Conclusion
And there you have it! It can seem a bit daunting at first, but prepping your app to localize is not a difficult process. And we're here at TranslateCI to make it as easy as possible.