React I18n Quickstart Guide
Localizing a React app is a snap with the excellent I18next internationalization framework. By the end of this article, you'll be able to get a multi-language React app with a locale switcher component up and running.

Laracasts has a really great free series on getting started with React. We're going to use the obligatory todo list example app from that series as a starting point. From there, we will
Install
react-i18nextand set it up for our app.Prepare our templates to localize by wrapping everything in translation helpers.
Store and retrieve our phrases from JSON files.
Use TranslateCI to translate everything into French.
Add a language switcher component to the app so the user can select their language.
Let's dive in!
Setup
Start by grabbing a copy of the laracasts/lc-react-testing-todo repository from GitHub. Then we're just going to install our dependencies:
npm install react-i18next i18next i18next-browser-languagedetector i18next-http-backend --savei18nextis the base internationalization framework.react-i18nextis the React-specific implementation.i18next-browser-languagedetectoris pretty much what it sounds like. It allows us to detect the user language in the browser.i18next-http-backendmakes it easy to fetch locale files from our backend server.
Next, we will configure I18next. Create a new file at /src/i18n.js.
import i18n from 'i18next';
import { initReactI18next } from 'react-i18next';
import LanguageDetector from 'i18next-browser-languagedetector';
import Backend from 'i18next-http-backend';

i18n
    .use(Backend)
    .use(LanguageDetector)
    .use(initReactI18next)
    .init({
        debug: true,
        fallbackLng: 'en',
        interpolation: {
            escapeValue: false,
        },
    });

export default i18n;
This just configures i18next with our plugins and sets a few options. You can read here for the full set of options.
Preparing Our Templates
Next, we're going to go through our templates and wrap everything in translation helper functions. React-i18next provides a few different translation helpers, I prefer to use the t helper for almost everything.
Let's go through our components in src/components one by one. First, App.jsx. We just import useTranslation from react-i18next and set our translation helpers. Then wrap our default todos in the t helper function .
// ...
import { useTranslation } from 'react-i18next';

function App() {
  const {t} = useTranslation();
  const [todos, setTodos] = useState([
    {
      id: 1,
      title: t('Finish React Series'),
      isComplete: false,
      isEditing: false,
    },
    {
      id: 2,
      title: t('Go Grocery'),
      isComplete: true,
      isEditing: false,
    },
    {
      id: 3,
      title: t('Take over world'),
      isComplete: false,
      isEditing: false,
    },
  ]);
// ...
}

export default App;
Our empty state at NoTodos.jsx is also really simple.
import React from 'react';
import { useTranslation } from 'react-i18next';

export default function NoTodos() {
  const { t } = useTranslation();
  return (
    <div className="no-todos-container">
// ...
      <p>{ t('Add some todos...') }</p>
    </div>
  );
}
TodoForm.jsx just has a placeholder we need to translate:
import React, { useState } from 'react';
import PropTypes from 'prop-types';
import { useTranslation } from 'react-i18next';

// ...

function TodoForm(props) {
  const { t } = useTranslation();

// ...

  return (
    <form action="#" onSubmit={handleSubmit}>
      <input
        type="text"
        value={todoInput}
        onChange={handleInput}
        className="todo-input"
        placeholder={ t("What do you need to do?") }
      />
    </form>
  );
}

export default TodoForm;
And finally, the list at TodoList.jsx. This one is slightly different because we have a plural and a variable interpolation.
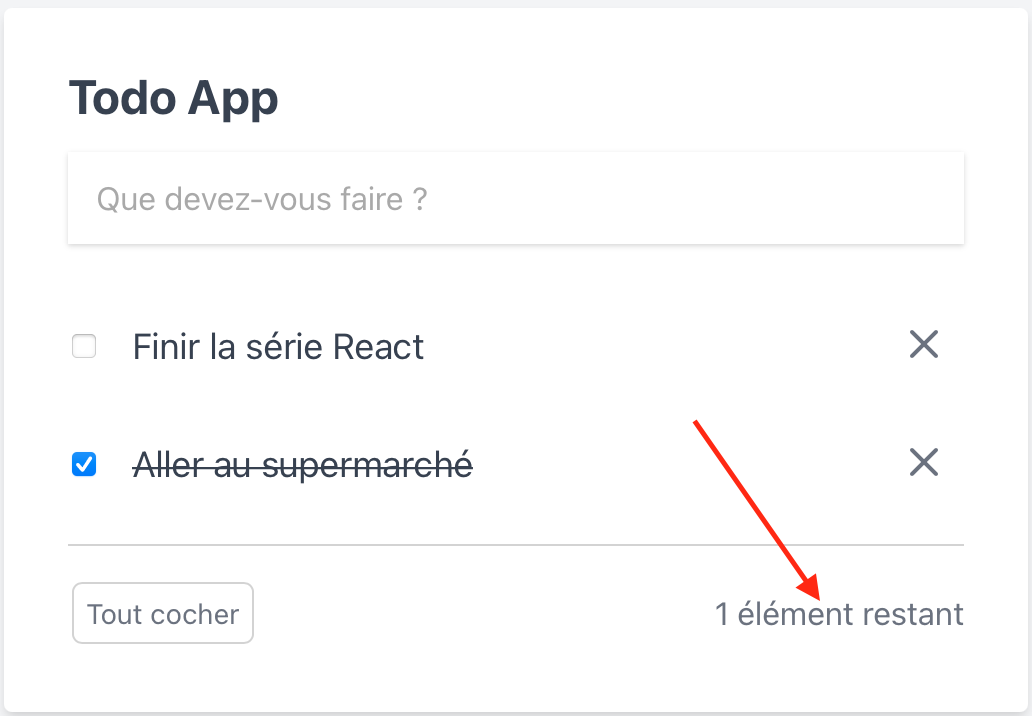
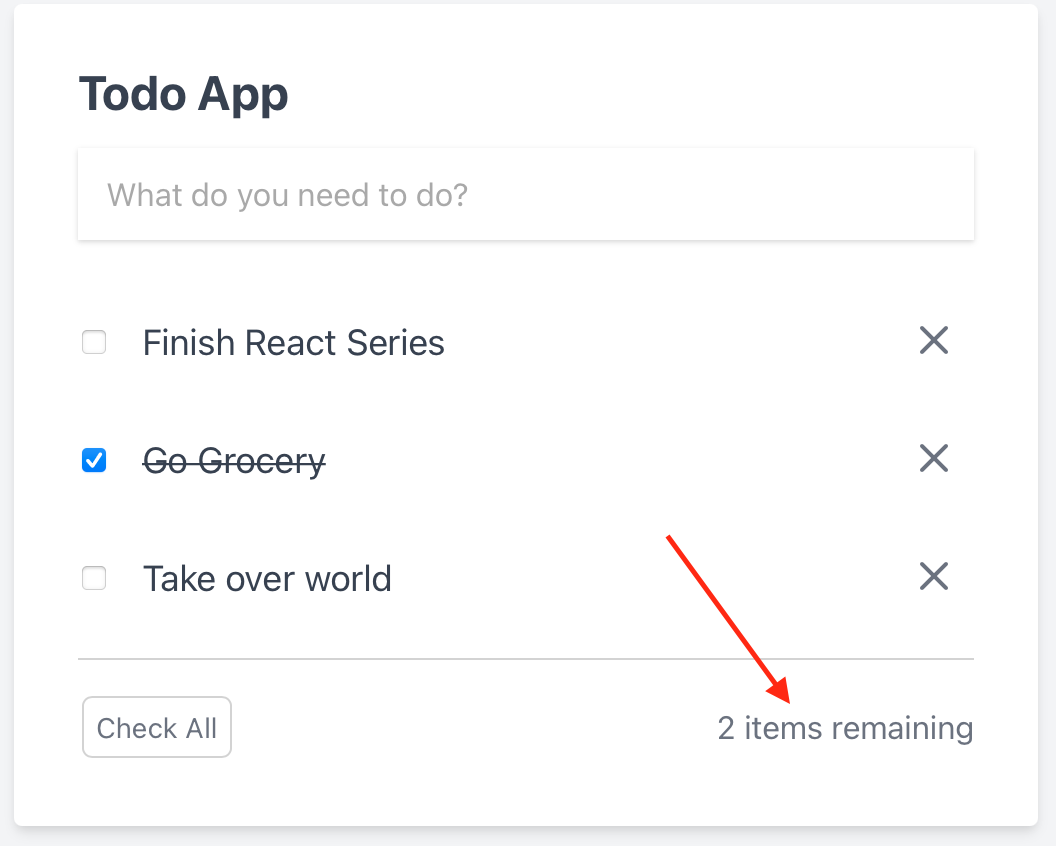 Items will change based on the number of items we're talking about, and the number 2 is dynamically inserted here. Here's what that looks like:
<span>{ t("items_remaining", {count: props.remaining()}) }</span>Unfortunately, that means that we don't have a fallback translation if the key doesn't exist in our default English translation file, so we'll need to create that. Create a file at public/locales/en/translation.json that looks like this:
{
    "items_remaining_one": "{{ count }} item remaining",
    "items_remaining_other": "{{ count }} items remaining"
}
If count is one, it will use the first translation and if it is any other number it will use the second. Some languages have different pluralization rules depending on the number of items, so check the documentation if you need to vary these.
So now, our TodoList.jsx file looks like this:
import React from 'react';
import PropTypes from 'prop-types';
import {useTranslation} from 'react-i18next';

//...

function TodoList(props) {
  const { t } = useTranslation();
  return (

// ...

      <div className="check-all-container">
        <div>
          <button onClick={props.completeAllTodos} className="button">{ t('Check All') }</button>
        </div>

        <span>{ t("items_remaining", {count: props.remaining()}) }</span>
      </div>
    </>
  );
}

export default TodoList;
Because we're using the HTTP backend, translation.json is automatically loaded. So when we refresh the page, we'll see our items remaining phrase we defined above. Check out the README.md for more configuration options including separating out your translations into multiple JSON files.
Adding a new language
Let's add support for French. We'll use TranslateCI for this because
A. It's awesome
B. You're reading this on the TranslateCI blog
We'll start by logging in to TranslateCI and creating a new GitHub project:
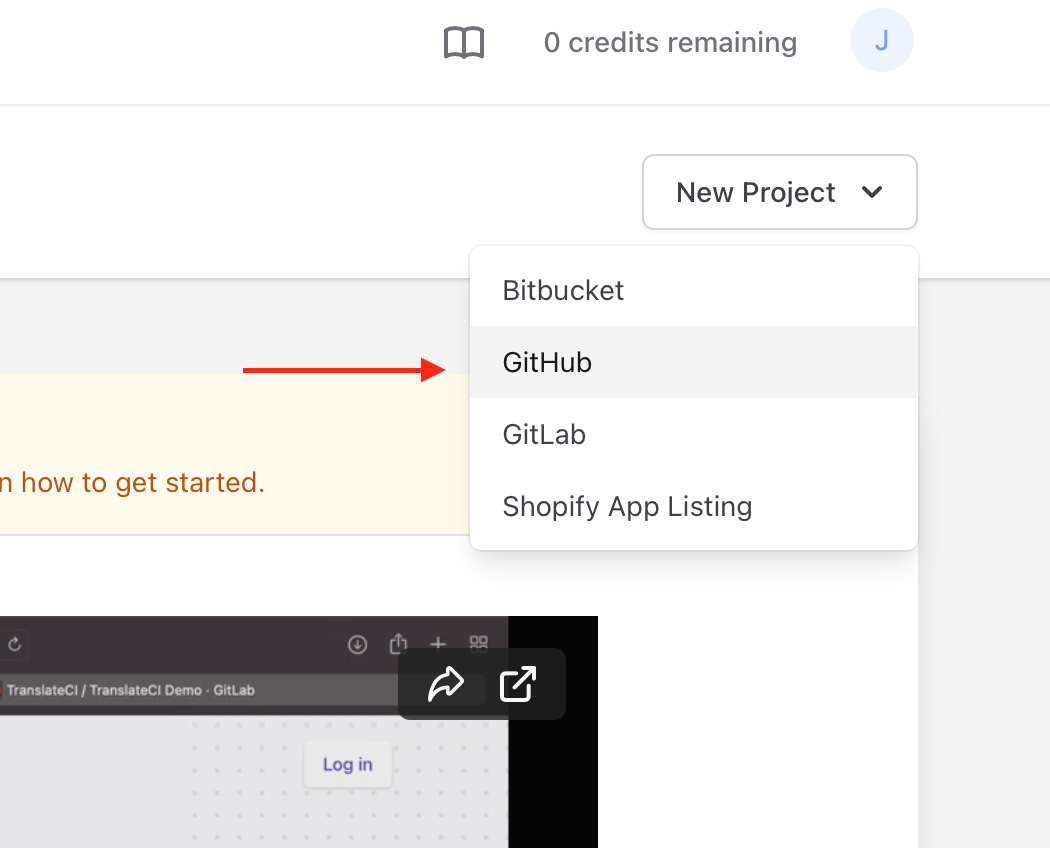 Then we’ll set up our project:
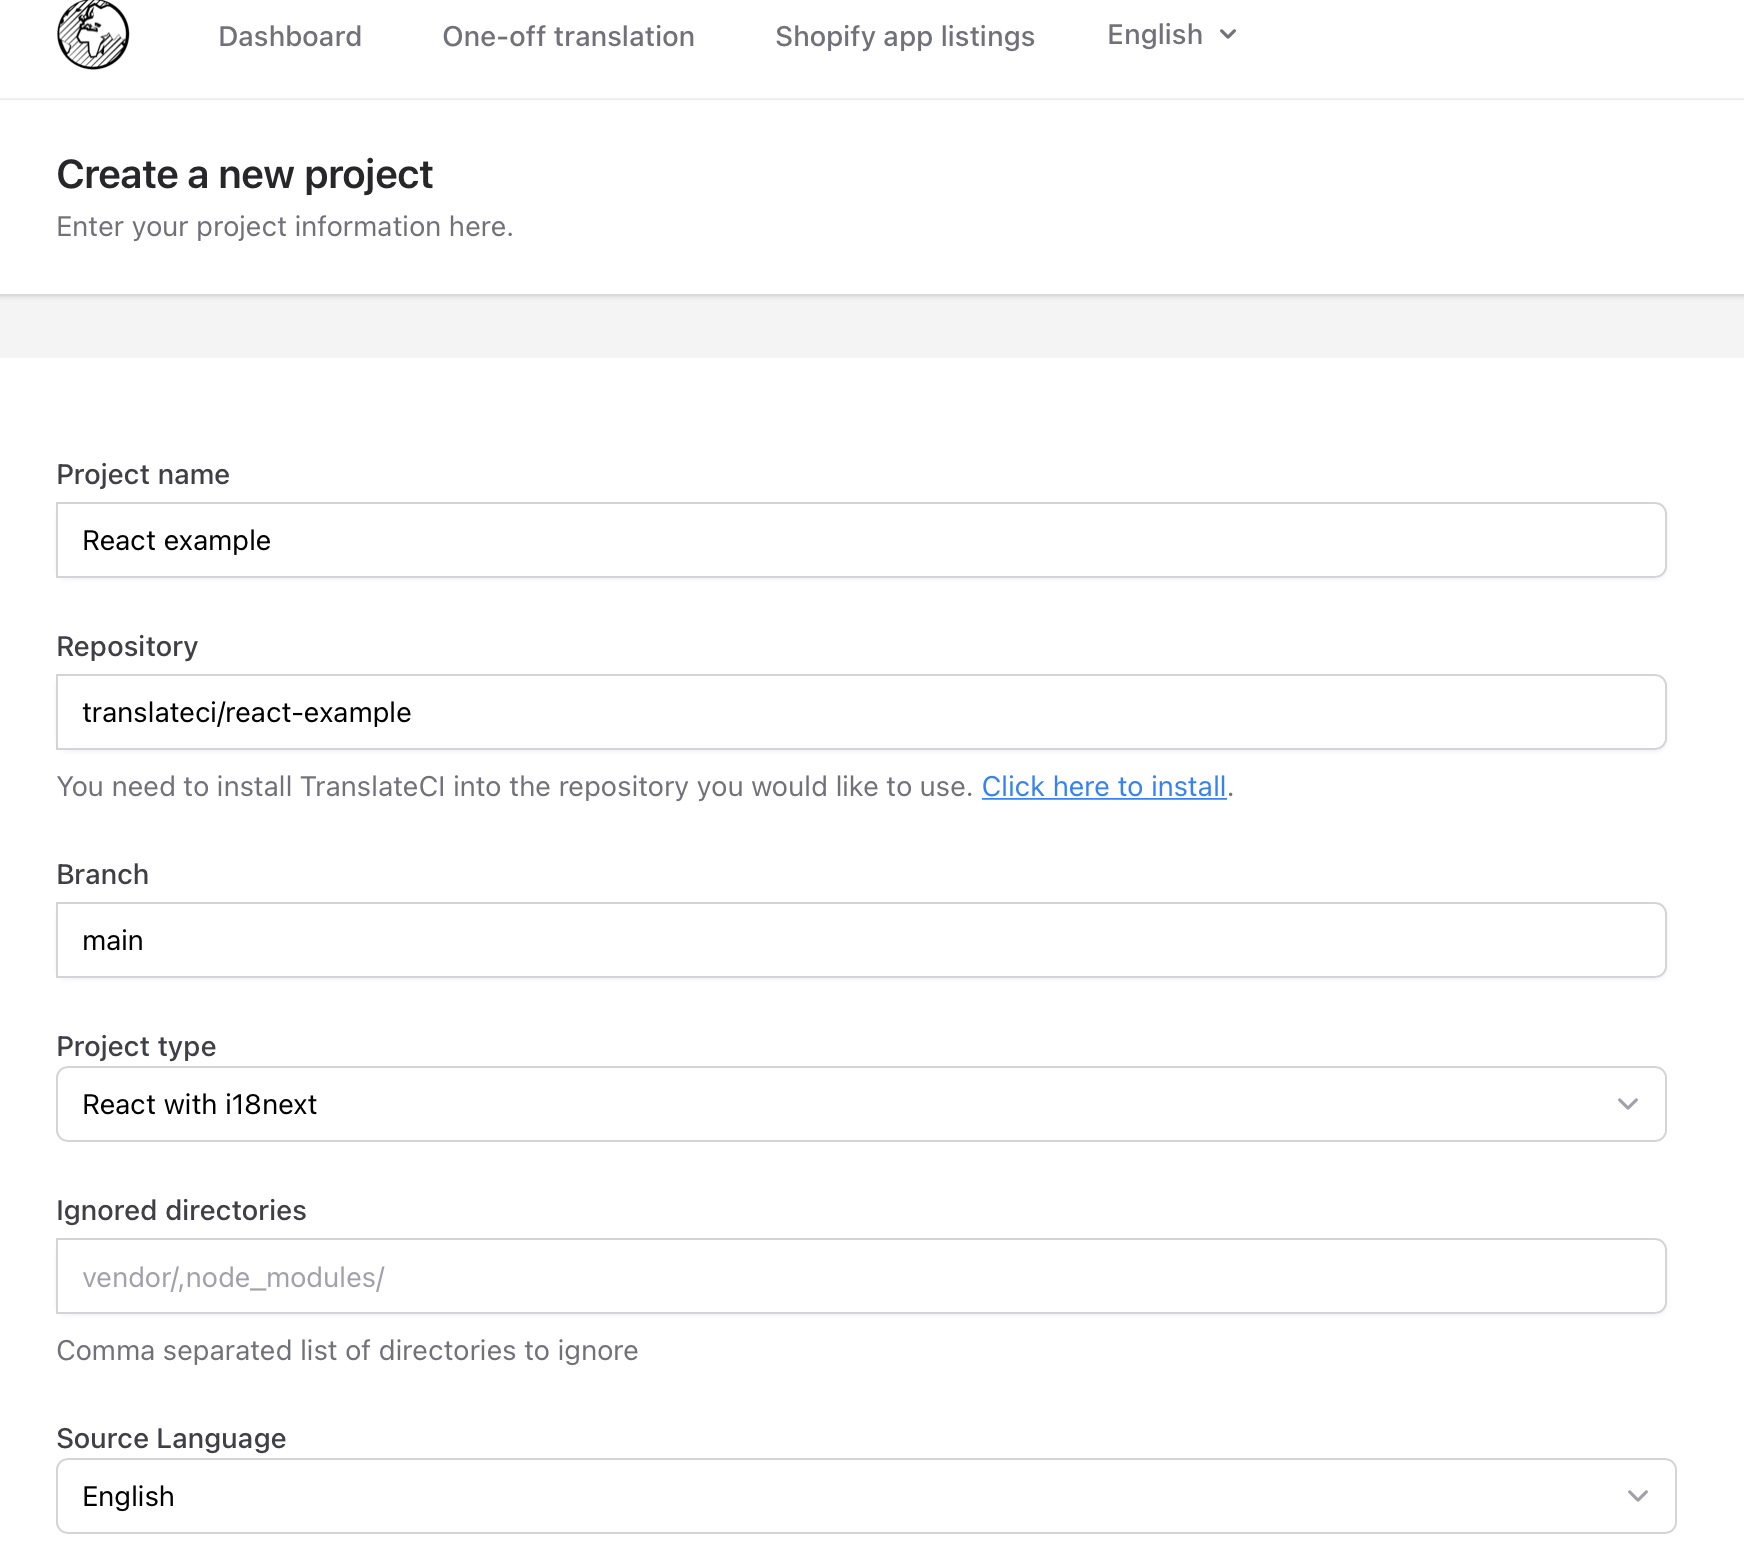
After we hit save, TranslateCI will take a minute to analyze our repo and give us a quote when it’s ready. We add some credits to our account and ship the job off.
An hour or so later, we get an email that our translation is done and, sure enough, there's a pull request:
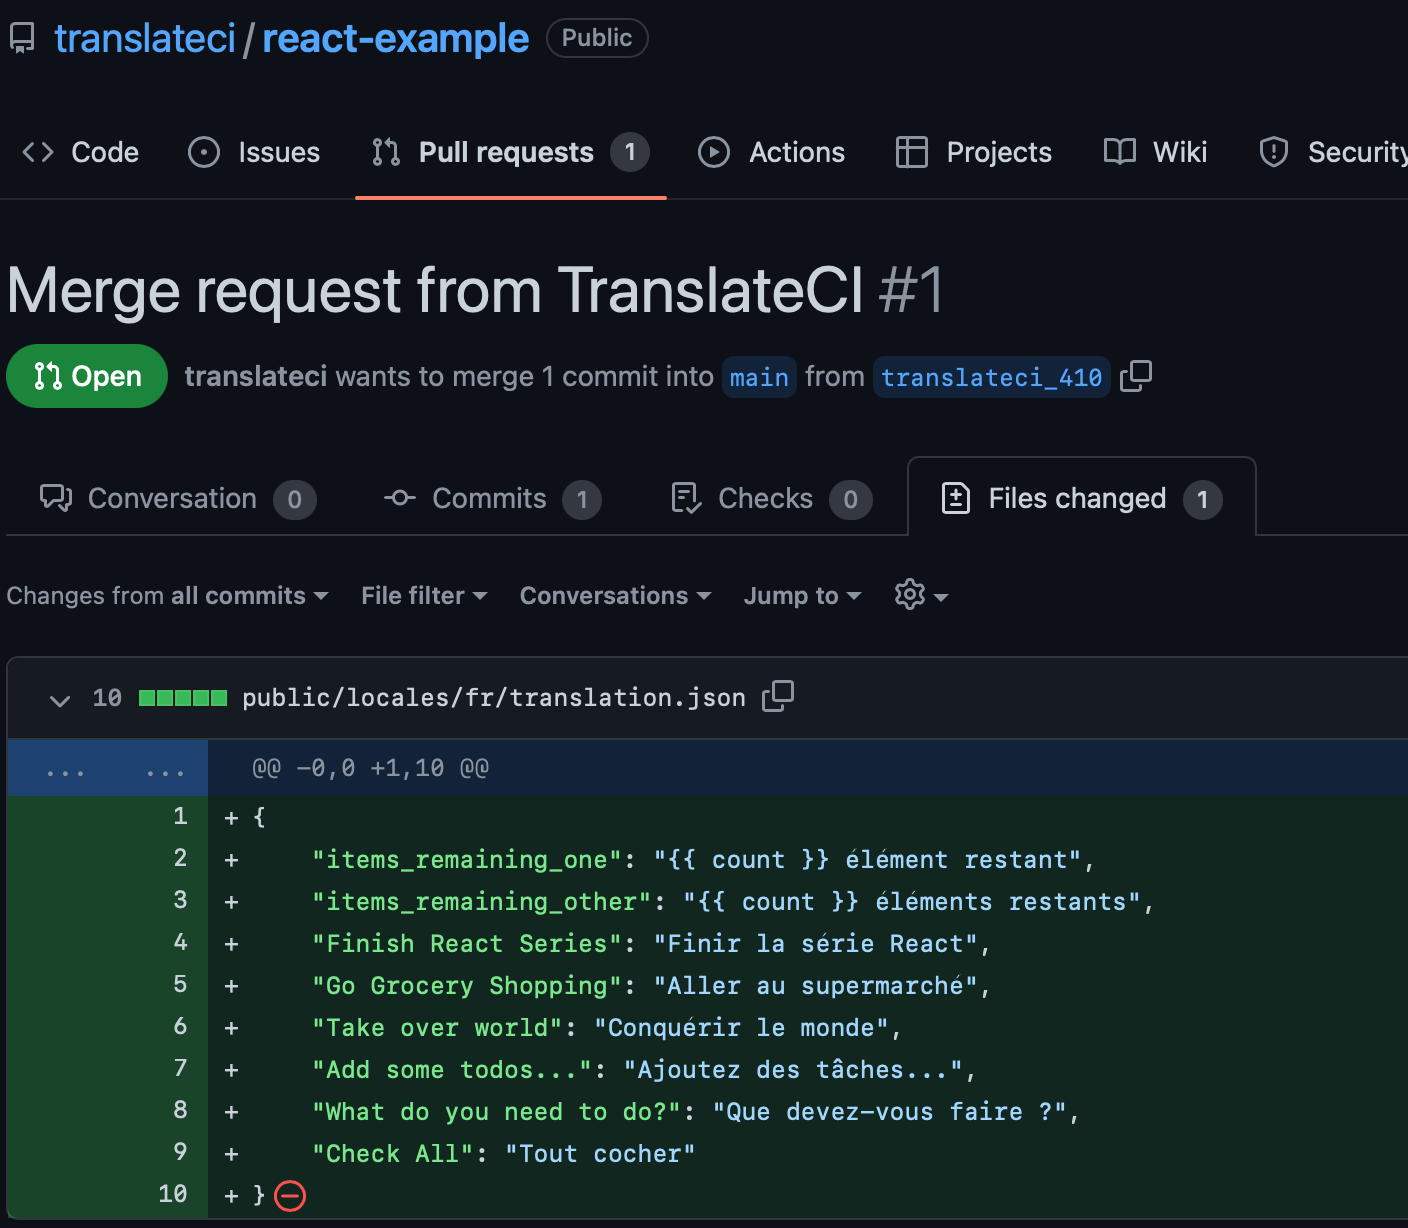 That all looks good, so we merge the pull request and pull the changes down to our dev environment.
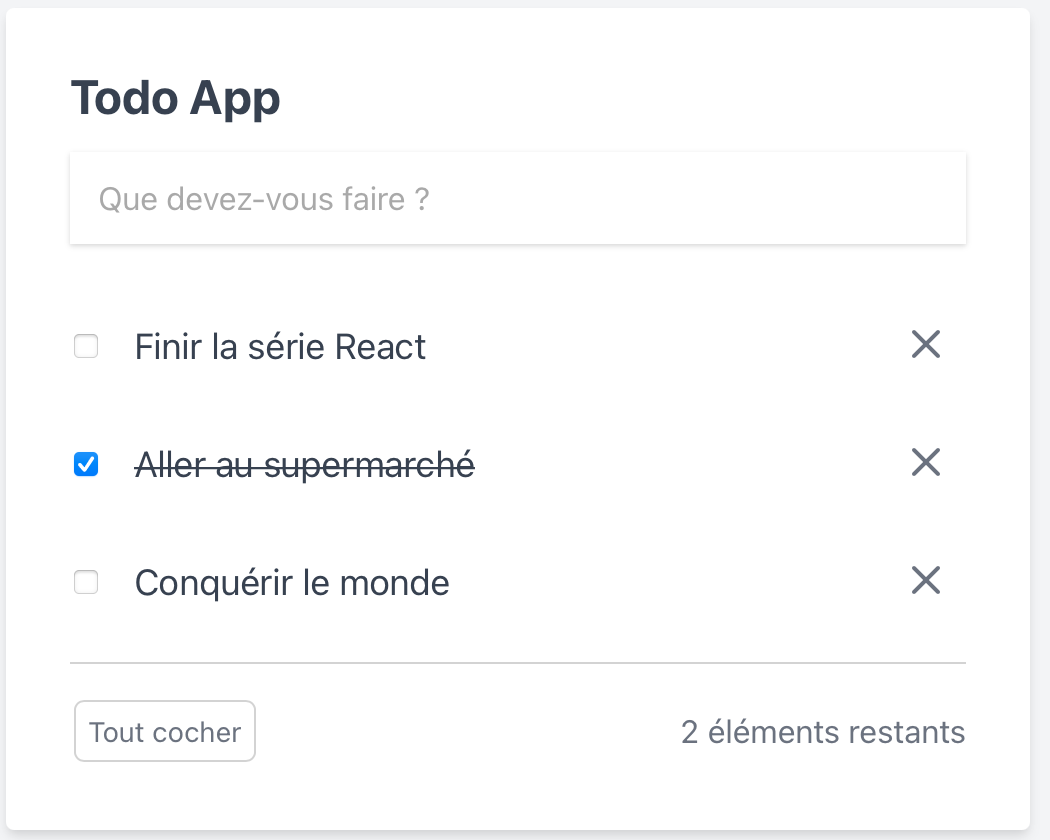
i18next-browser-languagedetector makes language switching a breeze. When we load up our Todo list app again, we can add ?lng=fr to the URL and Voilà! Our app appears in French:
 And, we can see our dynamic plural working here too if we click the X next to one of the open to-do list items:
 Cool thing is that the
 i18next-browser-languageDetector will store our language preference in localStorage, so when we come back later our app will automatically load in French.
Create a Language Picker Component
We can make a quick language picker component then at src/components/LanguagePicker.jsx:
import React from 'react';
import { useTranslation } from 'react-i18next';
export default function LanguagePicker() {
    const {i18n} = useTranslation();
    return (
        <div className="language-picker">
            <select defaultValue={ i18n.language } onChange={ (e) => i18n.changeLanguage(e.target.value) }>
                <option value="en">English</option>
                <option value="fr">French</option>
            </select>
        </div>
    )
}
And then just throw that into App.jsx
import { useState } from 'react';
import NoTodos from './NoTodos';
import TodoForm from './TodoForm';
import TodoList from './TodoList';
import LanguagePicker from './LanguagePicker';

// ...

  return (
    <div className="todo-app-container">
        <LanguagePicker />
      <div className="todo-app">
// ...
  );
}

export default App;
And now we have a very basic language picker that remembers our select language.
And that will do it! We've seen how to quickly localize a react app, get everything translated with TranslateCI and make a quick language picker. You can take a look at the GitHub repo here if there's anything you're not clear on.
